You are viewing documentation for Flux version: 2.2
Version 2.2 of the documentation is no longer actively maintained. The site that you are currently viewing is an archived snapshot. For up-to-date documentation, see the latest version.
This article is more than one year old. Older articles may contain outdated content. Check that the information in the page has not become incorrect since its publication.
How to use Weave GitOps as your Flux UI
Here comes the newest blog post in our ecosystem category. One of the key reasons to rewrite Flux was to break up the former monolith solution into separate controllers which provide distinct parts of the functionality. This allows users to pick just the parts they need, and integrators to very easily build on top of Flux’s APIs. Today we have a very active Flux Ecosystem - we very much welcome this to happen and see it as an indicator of success.
An introduction to Weave GitOps
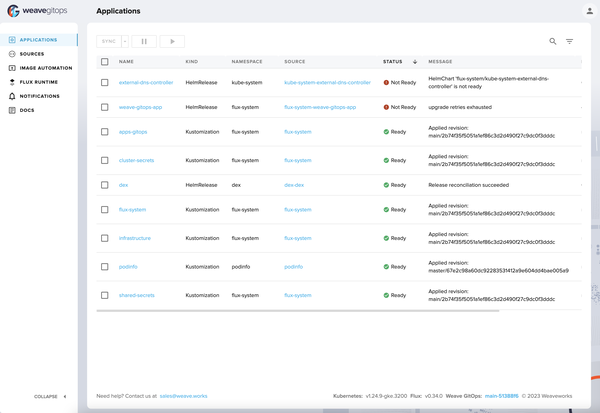
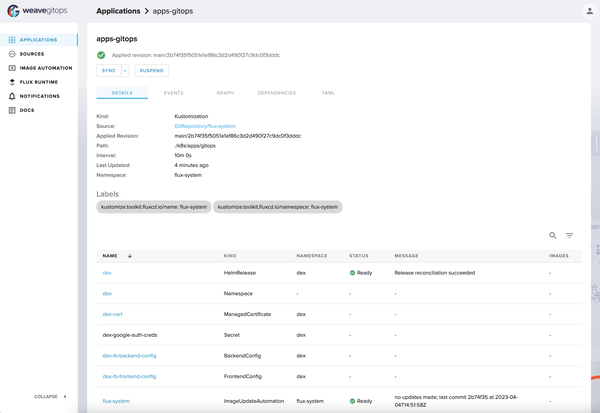
Today we would like to talk about Weave GitOps. It has been built out in the open for about a year and brings among other things one of the most requested additions to Flux: a UI.
With Weave GitOps you
- manage and view applications all in one place
- easily see your continuous deployments and what is being produced via GitOps
- sync your latest git commits directly from the UI
- leverage Kubernetes RBAC to control permissions in the dashboard
- quickly see the health of your reconciliation deployment runtime
The Weave GitOps team works very closely together with the Flux Community - many engineers on both teams are actually colleagues.
In addition to the UI Weave GitOps provides a frictionless way to get up to speed with your GitOps experience: GitOps Run. All you need to get started is a cluster and the Weave GitOps CLI. Everything else, including Flux and the Weave GitOps Dashboard will be set up automatically for you.
GitOps Run actually does more than the setup. You see changes sync almost in real time instead of the normal loop, where everything goes through a PR process, enabling you to iterate very quickly without sacrificing the GitOps pattern. The moment you are happy with the changes you create a PR just as usual. It’s the best of both worlds.
Watch this short video to see the beauty and ease of use: set up
If you are a Terraform user, you will love that the terraform-controller is integrated by default and your terraform resources will show up in the dashboard as well.
Getting Started
Using GitOps Run as shown in the video above is the easiest way to get set up. Period.
Here is an example of how to get an app deployment set up using GitOps (powered by Flux), including the dashboard.
brew install fluxcd/tap/fluxHead to podinfo and create a fork with the name
podinfo-gitops-run.Clone locally and change into the directory
export GITHUB_USER=<your github username>
# you can ignore these two commands if you already created and
# cloned your repository
git clone git@github.com:$GITHUB_USER/podinfo-gitops-run.git
cd podinfo-gitops-run
Now run the
gitopscommand with--no-sessionas it’s a single user cluster which we want to use in direct mode. The port-forward points at thepodinfopod we will create later on.gitops beta run ./podinfo --no-session \ --port-forward namespace=dev,resource=svc/backend,port=9898:9898The other arguments denote a directory where the manifests are going to be stored and we set up port-forwarding for the application we are about to install.
During the installation process, Flux will be installed if it isn’t and you will now be asked if you want to install the GitOps dashboard. Answer
yesand set a password.Note: If you do not set a password, you won’t be able to login to the GitOps UI 😱.
Shortly after you should be able to open the dashboard. The username is
adminand the password will be the one you set above.If you check the contents of the podinfo directory, you will notice a
kustomization.yamlfile. Edit the resources element to list"../deploy/overlays/dev"as well. It should like below:--- apiVersion: kustomize.config.k8s.io/v1beta1 kind: Kustomization name: dev-podinfo resources: [ "../deploy/overlays/dev" ]
If you save the file, podinfo will be deployed and able to access it at http://localhost:9898.
There’s more: if you Ctrl-C the running “gitops” process in the terminal, you will be asked if you want to change the deployment to be in “GitOps mode”, this means that the manifests for the cluster definition and dashboard will be added as well and pushed to GitHub for you.
As you can see, Weave GitOps takes care of a lot of the repetitive tasks and heavy lifting. A beautiful way to get set up and know that Flux is doing everything behind the scenes for you.
Is there more?
There is an Enterprise version of Weave GitOps as well, so if you need professional support for everything mentioned above, you will be covered. In addition to that, you get advanced features, such as templates and GitOpsSets - these are what will enable you to create a self-service for application teams.
The Weave GitOps team is very friendly and are always happy to help and
receive feedback. Just join them in the #weave-gitops channel on the
Weave Users Slack.
Come and talk to us
If you have feedback to this story, let us know on Slack or on social media and if you have a story to tell yourself, come find us as well - you can also hit us up on the fluxcd.io website repository. We want to report more stories from our ecosystem and Flux success stories. Thanks in advance for reaching out!

